Pight Mechanics Ranked by Learning Curve
Eight systems, one campaign—know which ones forgive mistakes and which ones demand a full plan.
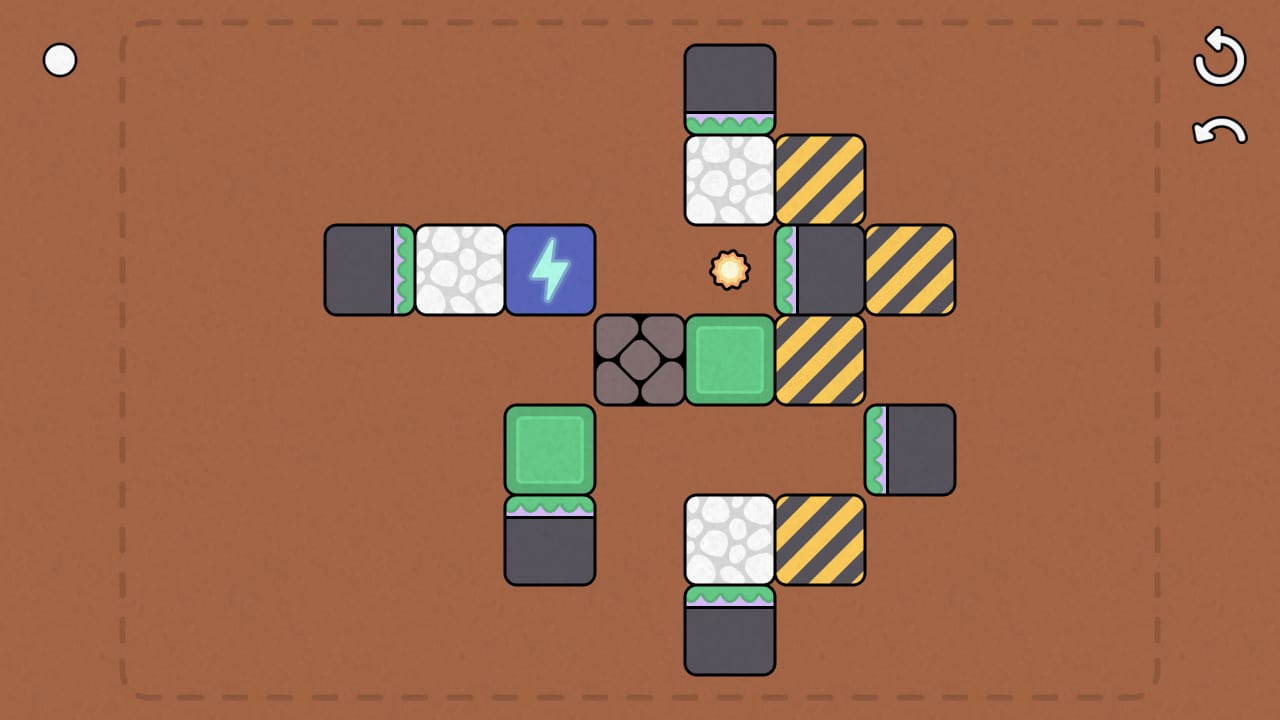
Every Pight level is a small logic machine. Mindlabor introduces eight mechanics across ninety stages, and the game never spells them out in text. Players who understand the learning curve ahead of time spend less time restarting and more time enjoying the click of a piston and the glow of a finished puzzle.
This page ranks each mechanic from easiest to learn (top tier) to steepest curve (bottom tier). Rankings reflect how quickly new players internalize the rule, not how enjoyable the mechanic is. For block-by-block detail, pair this list with block types explained.
S Tier — Pistons (push and pull)
Pistons are the front door to Pight. Click a piston, watch it extend, and a block moves one tile. Retract, and pull mechanics come into play on certain orientations. The feedback is immediate, the animation is smooth, and mistakes are cheap because unlimited undo lets you walk back a bad push.
Why pistons sit at the top: the cause-and-effect loop matches real-world intuition. Even players who never touched Minecraft redstone understand “something pushes something else.” Levels 1–10 exist largely to teach spacing, extension direction, and not blocking your own path.
Study tip: Before pushing, count how many tiles the target block must travel. If the count is odd and you only have extend cycles, you need a pull setup or a second piston line.
A Tier — Sticky blocks
Sticky blocks bond when they touch. Push one, and the whole cluster may slide together—a gentle introduction to multi-block planning. The rule is visible on contact, and failures are usually reversible unless dynamite enters the picture later.
Stickies climb to A rather than S because clusters change your effective shape. A two-by-two blob does not fit where a single block did. The Soulmates achievement nudges you toward deliberately keeping a pair attached through a full solution.
Study tip: When a level gives you both free blocks and sticky ones, decide early whether you want one big piece or several small ones. Splitting a cluster mid-puzzle is often impossible without undoing many moves.
B Tier — Hard blocks
Hard blocks resist casual pushing. They anchor layouts, block piston lines, and force you to route around immovable geometry. The Steam achievement Hard? exists because players underestimate them at first glance.
The curve is moderate: the block looks like any other until your piston refuses to budge it. Once you learn the visual tell, hard blocks become landmarks rather than surprises. Difficulty spikes when stickies attach to hard blocks or when dynamite is the only way to clear space.
Study tip: Treat hard blocks as walls in a Sokoban level. Plan paths assuming they never move unless a level explicitly signals otherwise.
B Tier — Dynamite
Dynamite clears tiles—and can delete the light block if you are careless. The fuse behavior is learnable in one explosion, but the failure cost is high enough to land dynamite in B tier alongside hard blocks.
Cost Effective and Ssssss… Boom! achievements reward efficient and dramatic uses of TNT. Many players blow up the wrong block once, learn the blast radius, and treat dynamite as a surgical tool afterward.
Study tip: Trace the blast pattern before detonating. If the light block sits in the same row or column, assume it is in danger until you prove otherwise.
C Tier — Portals
Portals teleport blocks between paired tiles. They replaced rails in the demo rework, and they remain one of the game’s most spatially confusing systems. A block enters one portal and exits another with orientation rules that are easy to misread on a crowded board.
Portals earn C tier because they multiply possibilities: the same push can send a block to three different destinations depending on portal pairing. Nether-mind celebrates mastering travel, and late levels expect portal hops inside sticky chains.
Study tip: Label portals mentally as A→B pairs before your first push. Execute one test push with undo ready, confirm exit facing, then build the real solution.
D Tier — Electricity and high voltage
Electricity conducts power across tiles to activate targets—including the light block in some layouts. Unlike pistons, you cannot always see the full circuit at a glance. Blocks may need to sit on powered tiles, and routing order matters.
High Voltage is among the rarest achievements because it punishes hands that solved earlier tiers with brute force. Electricity sits in D tier for combo depth: it rarely appears alone, and it interacts with hard blocks, stickies, and portals in the same grid.
Study tip: Solve the power path backward from the lamp. Ask which tile must be energized last, then which block must rest there before any piston fires.
F Tier — Redstone-style routing and off-grid logic
The steepest curve belongs to advanced routing: feeding power through multiple stages, using pistons as switches, and thinking outside the visible grid—the spirit of the Off the Grid and Redstone Engineer achievements. These puzzles borrow the fantasy of Minecraft redstone without copying it literally.
Why F tier: one wrong push can collapse an entire circuit, undo may not tell you which step broke the chain, and the game assumes you have internalized every prior mechanic. Levels 70–90 are built here. Bulk Order—pushing many blocks in precise sequence—also lives in this band.
Study tip: Use the puzzle planning checklist. Write move order on paper if needed; Pight allows unlimited undo, but your time is finite.
Tier summary table
| Tier | Mechanic | Why it ranks here |
|---|---|---|
| S | Pistons | Instant feedback, low failure cost |
| A | Sticky blocks | Clear rule, moderate spatial change |
| B | Hard blocks | Simple once identified, blocks routes |
| B | Dynamite | Fast to learn, high mistake penalty |
| C | Portals | Pairing and orientation multiply options |
| D | Electricity | Hidden paths, heavy combo use |
| F | Advanced routing | Full-system planning, off-grid logic |
Putting the tiers to work
Use S and A tiers to build confidence in the first third of the campaign. When B-tier tools appear, slow down and read the board twice. C and D tiers are where most players stall—return to block types if a color or symbol confuses you. F-tier thinking is the endgame; pair it with the level editor guide if you want to practice without pressure.
For impressions from players who cleared the demo before launch, see demo review. For patch context on portal and undo changes, see demo update history.
Frequently Asked Questions
Quick answers to the most common questions.
What are the eight mechanics in Pight?
Pistons, sticky blocks, hard blocks, dynamite, portals, electricity, and advanced redstone-style routing—with pistons and stickies forming the foundation every other system builds on.
Which mechanic is hardest for new players?
Advanced routing and electricity puzzles in the late campaign demand the most planning, especially when portals and stickies share the same grid.
Does the demo include all eight mechanics?
The demo introduces early systems across fifteen levels with a faster cadence. The full game's ninety levels spread mechanics more gradually and add late-game combinations.
Why were rails removed?
Mindlabor replaced rails with portals in a major demo update to simplify transport rules and improve how mechanics interact. See [demo update history](/updates/demo-update-history/).
How do I practice one mechanic in isolation?
Replay levels from the world map or use the full game's level editor. The [level editor guide](/tools/level-editor-guide/) explains how to build custom scenarios.
Do tier placements change after updates?
Major patches can shift how a mechanic feels—portal rework and undo are examples—but the relative learning curve order has stayed stable since launch.